Raspberry Pi a $35 credit-card sized computer is an excellent piece of hardware that can be used to run many of small workloads for personal use, learning and sometimes even for use at SMBs and Enterprises.
Yourls (Your Own URL Shortener) is a small PHP application which uses MySQL as DB to run our own URL shortening service similar to well known bit.ly and tinyurl.com
I Have been running Yourls on Ubuntu VM on Hyper-V with Apache HTTPD for an year now.
After getting Raspberry Pi wanted to shift Yourls to Raspberry Pi and due to limited resources available on RPi I chose NGINX webserver instead of Apache webserver to run Yourls.
This post is a walkthrough of working configuration to setup Yourls under 10 minutes on Raspberry Pi running NGINX webserver, PHP and MySQL.
My Setup – Hardware and Software details
1. Raspberry Pi Model B (512 MB RAM) connected to LAN
2. 4 GB Class 4 SD Card
3. PiBang Linux Server Edition
4. Windows 8.1 Laptop with Wifi
5. Putty
6. Win32 Disk Image
7. Cisco E1200 Wifi Router
8. Cable Broadband – 5 Mbps
Note - I assume you are using Raspbian or some derivative like Pibang and know how to setup Raspberry Pi to connect using ssh, If not references to help are available at the end of this post.
Step – 1: Prepare Raspberry Pi
Burn your distro to SD card, boot Raspberry Pi and finish initial configuration
Step – 2: Install required packages
Connect to your Raspberry Pi using SSH and issue below commands to install all the needed prerequisites
apt-get update && apt-get -y upgrade && apt-get -y install mysql-server mysql-client nginx php5 php5-mysql php5-fpm php-apc chkconfig
This would look for updates and upgrade all the existing packages of the distro and install below components along with dependencies
- 1. NGINX webserver
- 2. PHP 5
- 3. MySQL Database server
During installation we need provide password for MySQL root to complete the installation
Step – 3: Configure MySQL DB
Login to MySQL DB and create database and user to use with Yourls. Below are commands for reference
Login to MySQL with Admin access
mysql –u root –p
password: ENTER-ROOT-PASSWORD-PROVIDED-IN-STEP-2
Create Database
create database yourlsdb;
Create User for Yourls
create user 'yourlsdbuser'@'localhost' identified BY 'YOUR-PASSWORD-HERE';
Grant Permissions for above created user on the database
grant all on yourlsdb.* TO yourlsdbuser@localhost;
Exit
Step – 4: Configure NGINX webserver
We first need to create a directory to which would be the root directory for Yourls
mkdir /var/www
Unlink default site in NGINX
unlink /etc/nginx/sites-enabled/default
Create NGINX config file for Yourls
vi /etc/nginx/sites-available/yourls
Add below entries to newly created config file above, save and exit
server {
listen 80;
root /var/www;
index index.php index.html index.htm;location / {
try_files $uri $uri/ /yourls-loader.php;
location ~ \.php$ {
fastcgi_pass unix:/var/run/php5-fpm.sock;
fastcgi_index index.php;
fastcgi_param SCRIPT_FILENAME $document_root$fastcgi_script_name;
include fastcgi_params;
}
}}
Create links to yourls config file
cd /etc/nginx/sites-enabled
ln -s ../sites-available/yourls
Step – 5: Download and Prepare Yourls for Installation
Download the latest (1.6 while writing this post) Yourls zip archive from git here
cd /var/www
wget https://github.com/YOURLS/YOURLS/archive/1.6.zip
Unzip the archive and copy appropriate files to required folders
unzip 1.6.zip
cp -r YOURLS-1.6/* .
rm -r YOURLS-1.6
cp user/config-sample.php user/config.php
Open config.php
vi user/config.php
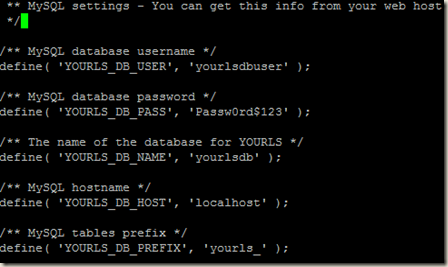
Provide details for MySQL DB connectivity
/** MySQL database username */
define( 'YOURLS_DB_USER', 'yourlsdbuser' );
/** MySQL database password */
define( 'YOURLS_DB_PASS', 'Passw0rd$123' );/** The name of the database for YOURLS */
define( 'YOURLS_DB_NAME', 'yourlsdb' );/** MySQL hostname */
define( 'YOURLS_DB_HOST', 'localhost' );
Configure URL to be used with Yourls
define( 'YOURLS_SITE', 'http://yoursite.com' );
Configure Yourls Admin and Password
$yourls_user_passwords = array(
'yourlsadmin' => 'password123',
);
Step – 6: Install Yourls
Start NGINX webserver
Service nginx start
Configure NGINX for auto start when Raspberry Pi is rebooted
chkconfig nginx on
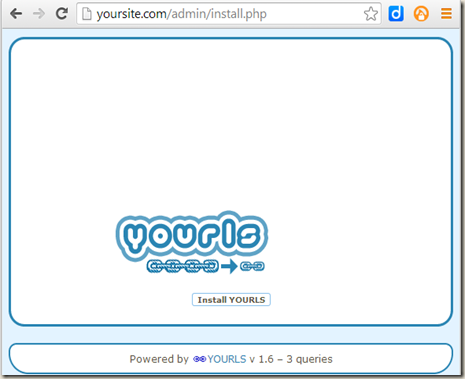
Point browser to below url of yoursite and click on Install Yourls
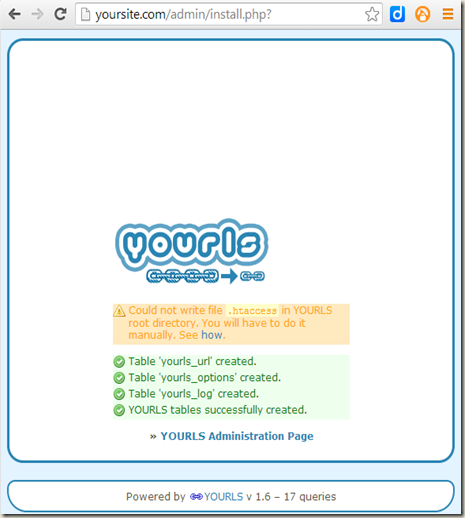
Once installation is complete you will see below page. Ignore .htaccess warning
Click on Yourls Administration Page to login using Admin id and password created above in Step – 5 to start creating short URLs for your long URLs.
With this we have successfully completed Yourls installation on Raspberry Pi.
Reference-
1. http://www.ducky-pond.com/posts/2013/Sep/setup-a-web-server-on-rpi/
2. http://packetcollision.com/2012/01/27/yourls-and-nginx-an-updated-config/
Disclaimer – I am no expert of NGINX and MySQL. You are free to suggest and comment on any configuration provided above


No comments:
Post a Comment
Share what you feel